The Returning Skier’s Handbook
Our Premise
There are enough skiers returning to the sport after long absences to qualify as a buyer type. This is a wonderful phenomenon, but not without its perils. As former skiers, returnees have some idea about the lay of the land, but if they haven’t skied in over 20 years, just about everything they know has passed its expiration date.
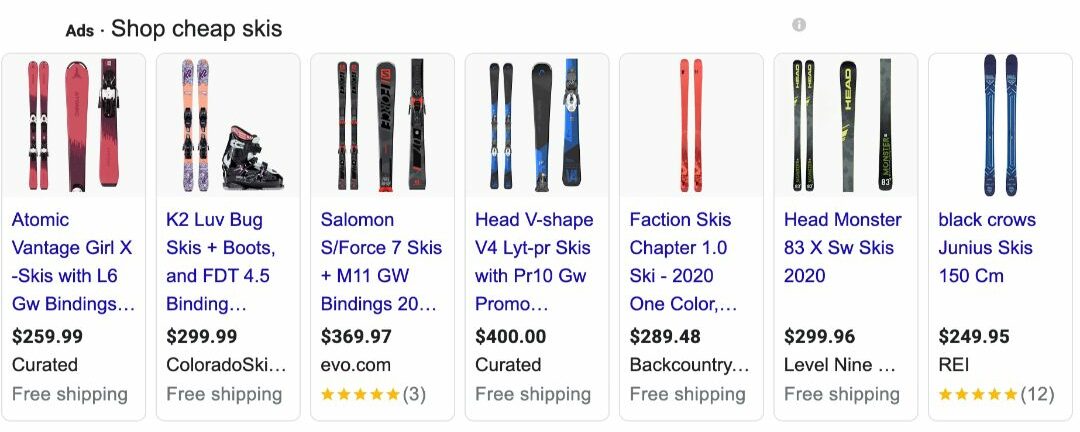
This concise collection of expert counsel is intended to close this critical information gap. Our focus is not on what to buy – see Realskiers.com for that – nor where to buy – the purpose of Jackson’s List – but how to buy. A buyer’s best defense against a poor choice is quality information, which, despite the proliferation of self-appointed experts of every stripe, is in shockingly short supply. But not to worry: you’re in good hands now.

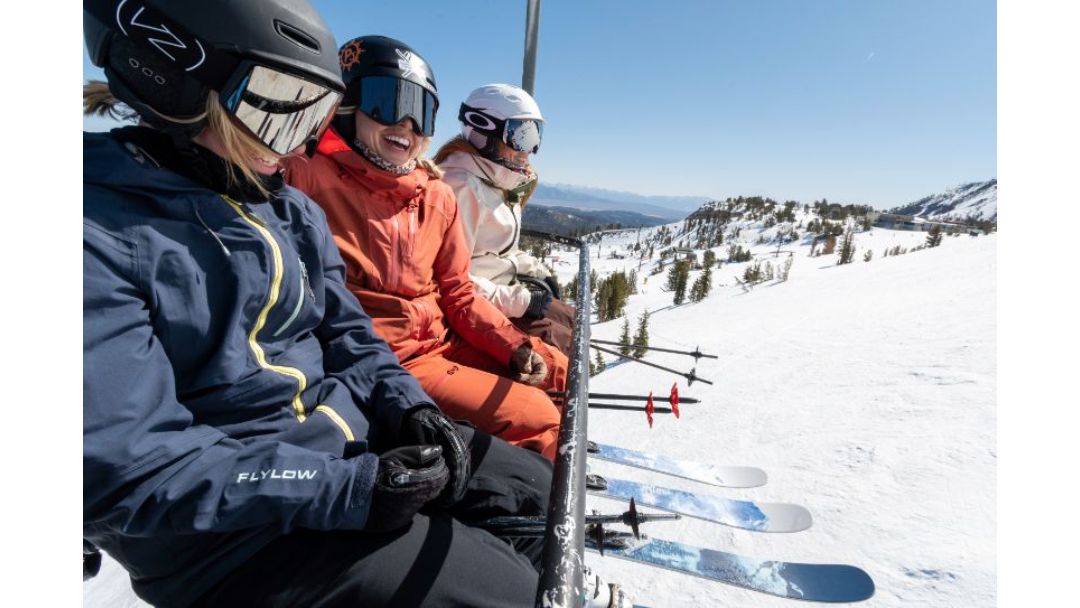
If the gear and the get-ups in this photo remind you of the last time you went skiing, you’ve missed a lot. Very little in this picture would look the same today; the lovely ladies would all be hidden behind helmets and facemasks, the skis would be much shorter and the clothes less colorful. The purpose of this handbook is to bring you swiftly up to speed.
Chapter-01
Some Basic Guardrails
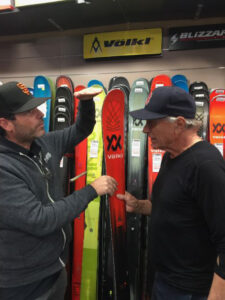
Be careful where you shop.
The Internet is a swamp suitable for finding the lowest available price, but if you don’t know what you’re looking for, you’re heading into dark waters without a guide. At this stage in your re-entry, you need an ally who can assess your needs face-to-face. Long distance counsel isn’t worth spit. (I realize that’s how I make my living, but I’m not your run-of-the-mill consigliere.)
Even if you ignore this advice and buy all you can on the Internet, you’re still going to need a real ski shop someday. Speaking as someone who has examined the sorry results of hundreds of misguided sales, the sooner you hook up with a shop you can trust, the more buying mistakes you can avoid.
You’ll find a selection of America’s most trusted specialty ski shops on Jackson’s List.
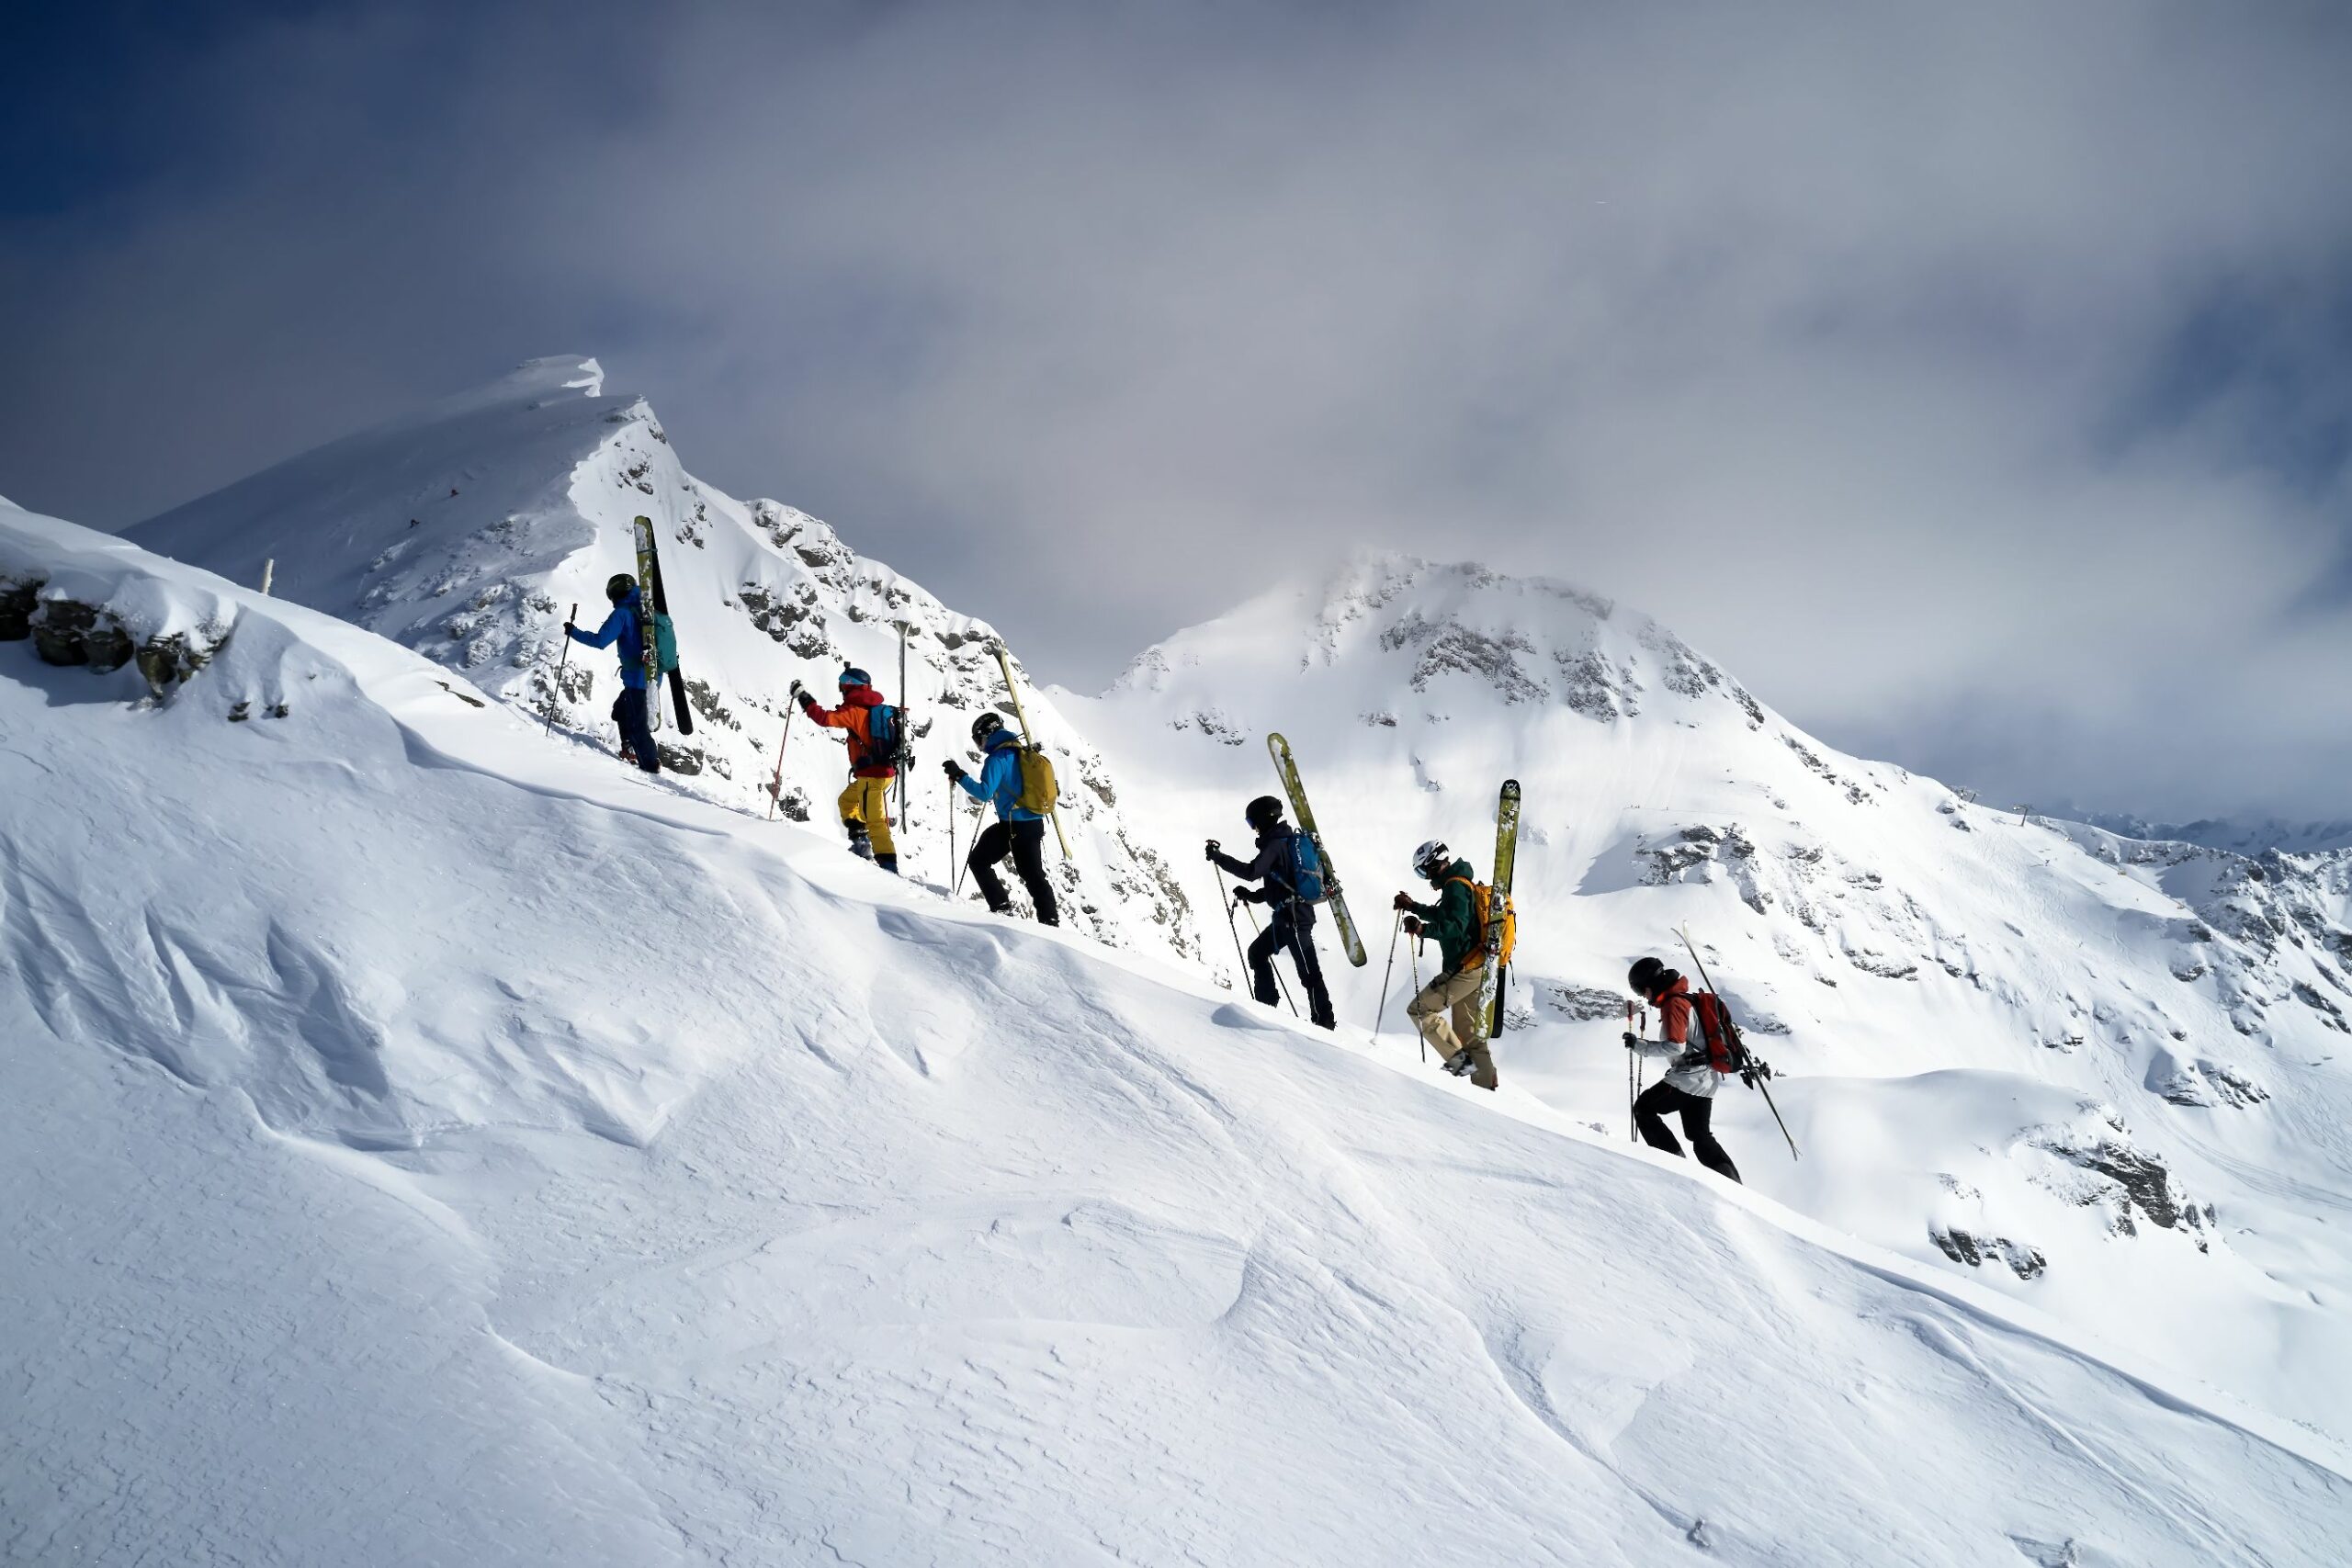
If you haven’t skied in over a decade, the backcountry is probably not the best place to re-start.
Interest in backcountry skiing is off the charts. Demand for BC gear will probably outstrip supply again this year, and there’s no indication the party is going to end anytime soon. But backcountry skiing and in-resort skiing are two very different beasts, with non-interchangeable gear and different requirements for preparation, education and fitness. All skills development should take place in-resort, preferably under professional supervision.
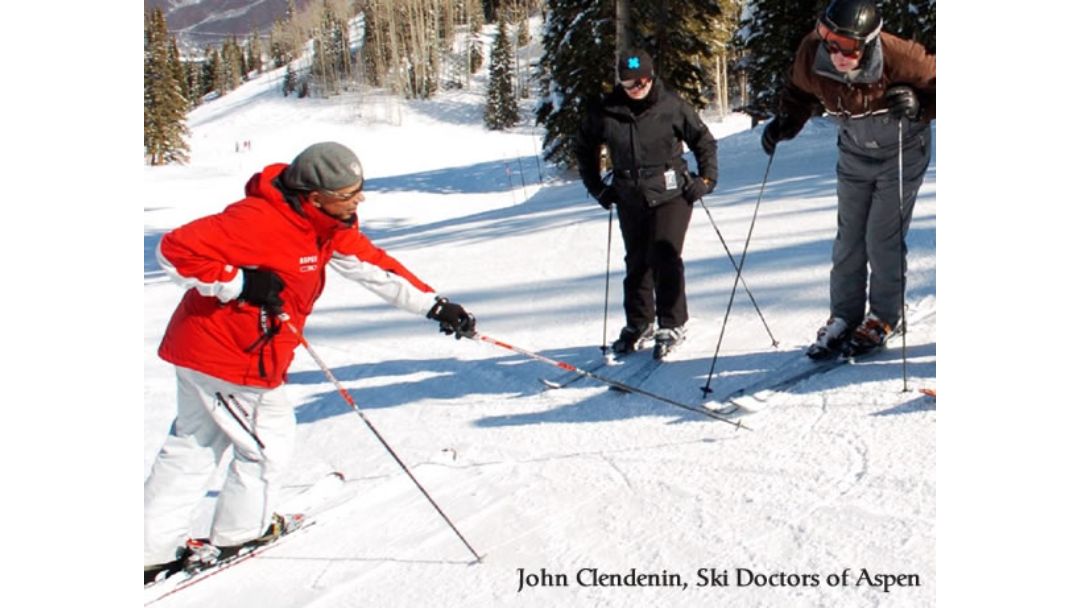
Take a Lesson
Depending on how long you’ve been an absentee skier, you may need a technique re-boot. That may sound daunting, but in fact, with properly selected and fit gear, it won’t take long to relearn the basics. Remember, even the best athletes in the world have coaches. The best time to get rid of old, bad habits is to rip them out before they can re-root.
Chapter-02
A 4-Point Primer on How to Buy Skis
 1. Prep for the Interview
 1. Prep for the Interview
One way to ensure a better buying experience is to prepare yourself for the exchange of information that sets the direction for the rest of the sale.
Salespeople are trained to open by asking a litany of questions. Be ready to reveal as much as you can about yourself as a skier. The key subjects to cover in your initial interview include:
-
Ski background
- How many years have you been skiing and how frequently per season?
- How would you assess your skills?
-
Ski style
- Are you cautious and conservative or aggressive and attacking?
- Do you like speed?
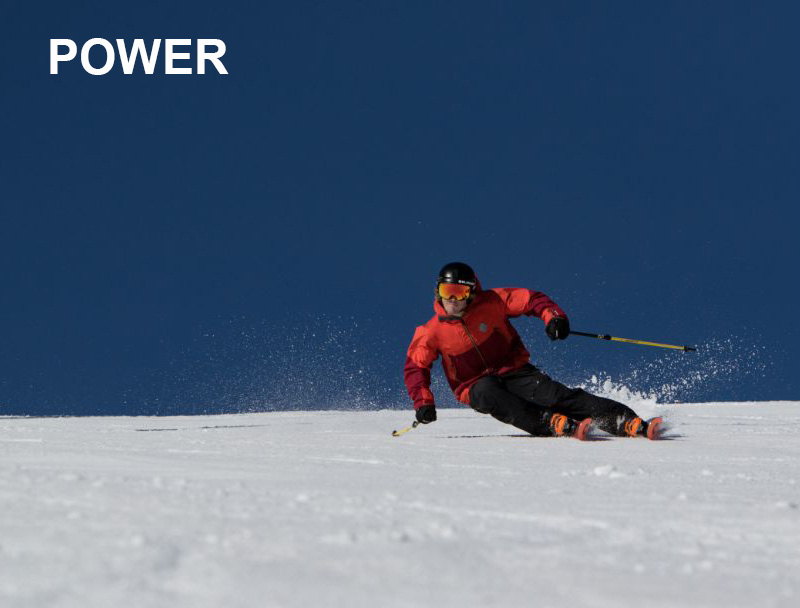
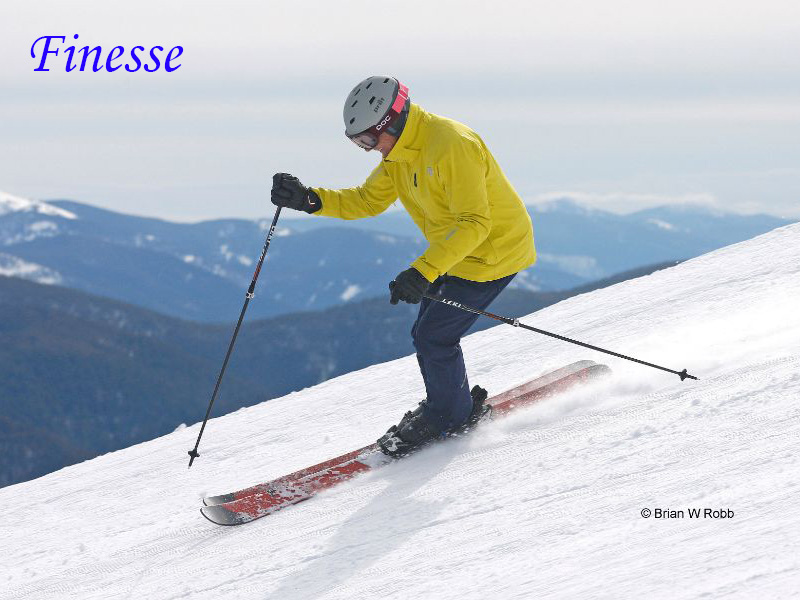
- Are you a Finesse or Power skier?
-
Current ski plans
- Where do you ski now?
- On what runs? Be as specific as possible as to where you ski and what sort of terrain and conditions you want to master.
- How much will you ski this year?
-
Why you ski
- What motivates you to get on the hill?
- Enjoy fresh air with friends?
- Learning new skills? Mastering a challenging sport?
- Skiing with family?
- Sharing your underlying reasons for skiing will help your salesperson match you to new gear more accurately.
-
What you last used for gear
- What you most recently used is always revealing to your salesperson, particularly your boots. If you own boots and plan on keeping them, bring them with you when you shop for skis.
-
Other factors
- If you have any concerns about costs, possible trade-ins, service charges for mounting or tuning, or any other issue that may bother you, make them part of the discussion. Give your salesperson as complete a picture of your needs and desires as possible.
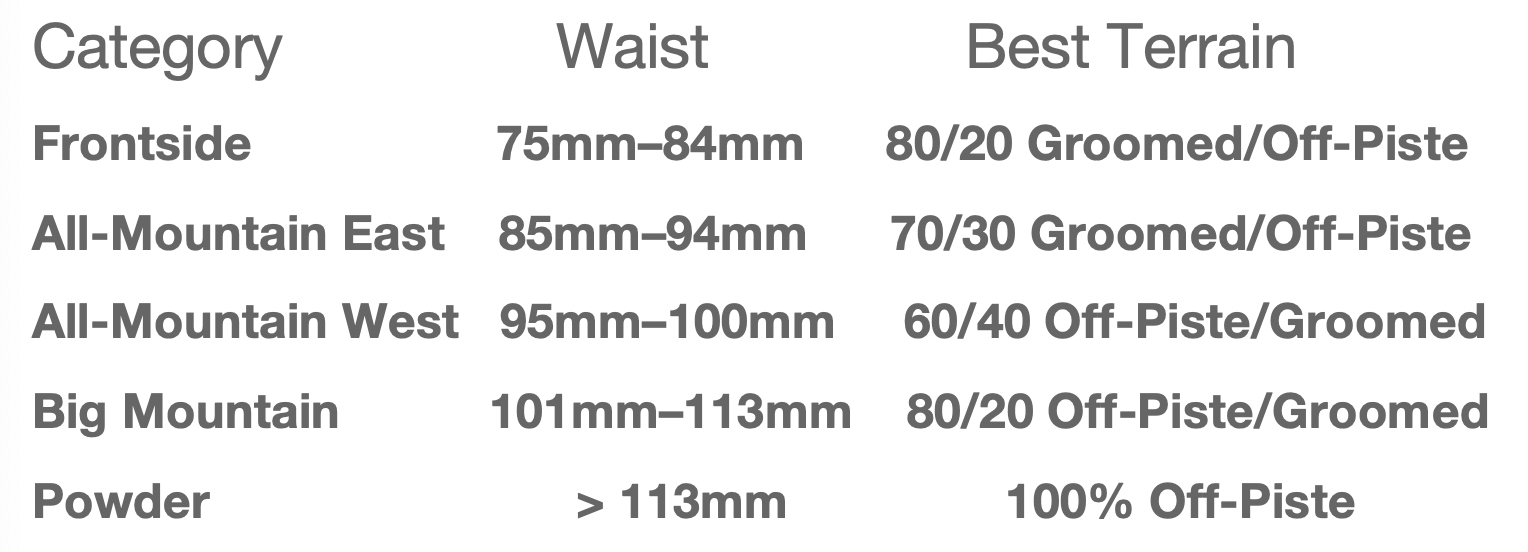
2. Learn the Basic Alpine Ski Categories
The simplest way to find the right ski is to focus first on your terrain preferences, as this will lead directly to the correct category. When discussing where you ski, be as specific as possible, naming the runs you like at the areas you frequent.
A ski’s genre is determined primarily by its width: narrow skis for hard snow, big fat skis for powder and medium width models for all-terrain capability. Determining where you’ll spend a typical ski day will tell you and your salesperson which category of ski is right for you.
3. Match your Skiing Style
Within each category are skis made for highly skilled skiers who are capable of extending their feet far out from under them in order to set their skis at a high edge angle. These skiers are comfortable at speed and capable of varying pressure, stance and degree of edge angle in any terrain. We classify these skiers as Power skiers.
Finesse skiers may have a very polished skill set, but they don’t generally exert as much force, ski as fast or attempt to set as high an edge as Power skiers. Their preferred skis might be softer flexing, less cambered and more forgiving.
 4. Find Your Length
 4. Find Your Length
Getting the right length is almost as important as finding the right model. As a general guideline, low-skill skiers should select a length close to chin-height, average skiers around nose-height and advanced skiers around the hairline.
But height isn’t the sole consideration. Weight is also a factor, as is speed and terrain preference. Some ski designs reduce a ski’s effective snow contact, so they won’t ski as long as they measure.
Chapter-03
Ski Care and Maintenance

If not properly cared for, skis will gradually lose their edging and gliding properties. Aside from keeping them clean and dry, the most frequent required maintenance is waxing the bases.
Wax both protects the bases from drying out and improves their ability to slide smoothly. A base that goes unwaxed for too long will begin to oxidize: the surface will look white, dried out and even hairy. Bases in this condition need to be stone ground by fancy machinery to restore their gliding properties, an expensive proposition.
To avoid pricey repairs and keep your skis easier to handle, have them hot waxed regularly, at least every 5 – 10 skier days. Waxing is something you can learn to do at home if you have the requisite set-up, tools, time and patience. Even new skis should be waxed, scraped and buffed before using.
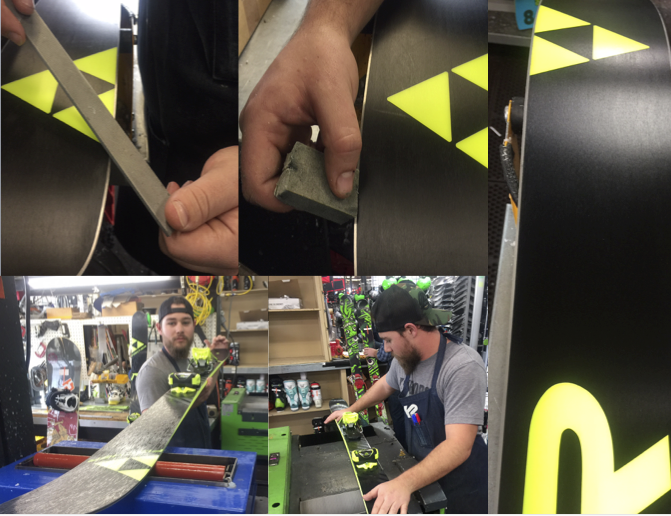
Having sharp, smooth edges is critical to maintain control, particularly on hard snow. When it feels like you’re losing your grip, it’s time to sharpen your edges. This is another skill that can be acquired by do-it-yourselfers, but it’s difficult to match the precision and accuracy of robotic machinery set to exacting tolerances.
Minor nicks and dings on the edge can be filed away with a diamond stone or smoothed over with a gummi stone. This won’t provide the complete repair possible with a well-equipped shop, but it will take down or remove any edge-catching burr until it’s time for a professional tune-up.
Chapter-04
The First Five Minutes
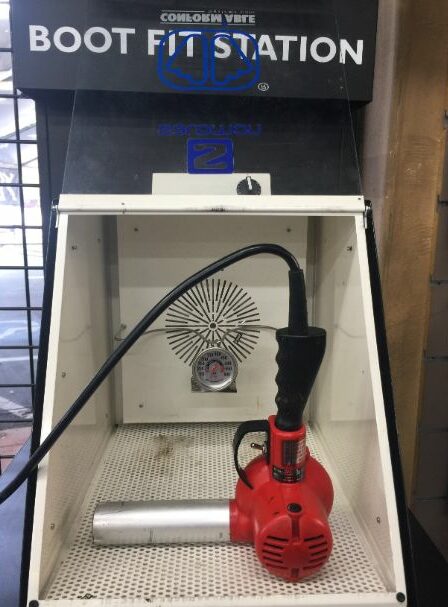
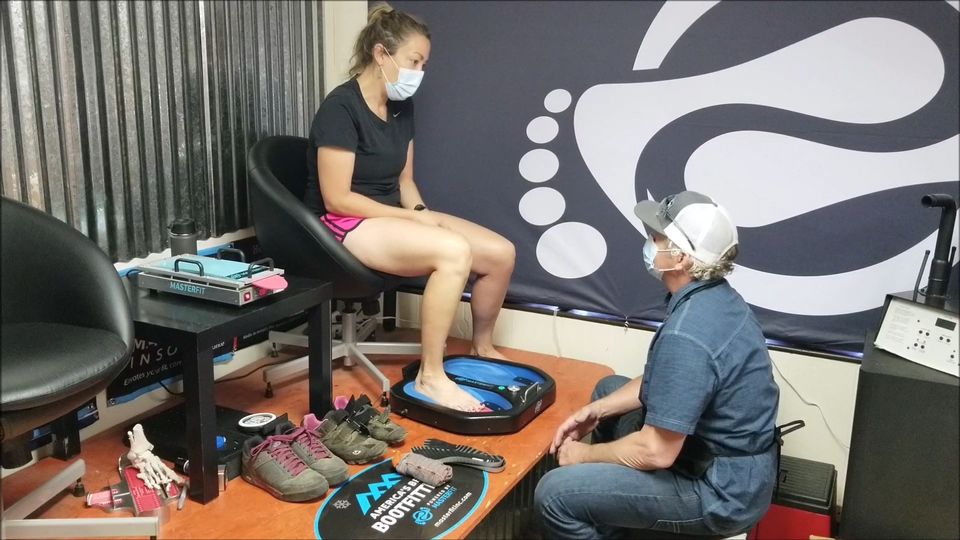
This bit of counsel is adapted from a Realskiers.com Revelation about how the first five minutes of a bootfitting session ought to unfold. The central issue in any sales encounter where the stakes are fairly high is trust. Customers are often reluctant to yield control of the sales dialog, which is only natural. However, if the customer assumes control of the sale, then the person who has the least idea what he or she is doing is now running the show. For the customer to surrender to the bootfitter’s care, there first has to be a solid foundation of trust. That trust must be earned in the first five minutes.
Some of the methods I’ll refer to below ought to be standard practice at any true specialty shop; other parts of my routine are techniques I’ve adopted over the years to better assess the skier sitting in front of me.
 After greetings and introductions – let’s imagine our boot customer is named Andrea – I’ll pose a few basic questions that allow Andrea to describe herself as a skier. I’ll learn where she normally skis or intends to ski (Mt. Rose), what trail conditions she prefers (groomed) and her experience level (an infrequent skier until this season, when she’ll be skiing more (new relationship)).
While I continue down my litany of questions – what boots has she used before?, does she already have her season pass?, is that guy standing over there the one who’s going to be guiding her development? – I observe how Andrea sits, her posture, where her feet are pointing (slightly outwards) and generally how she moves. I ask what other sports or exercise are regular parts of her lifestyle. Turns out she does a bit of everything, including heavy doses of cycling.
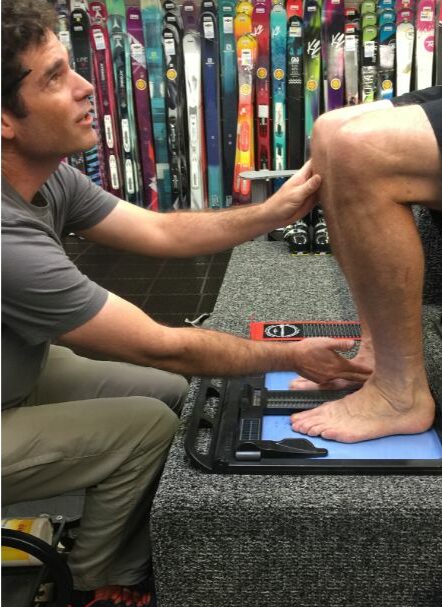
Now that we’re all relaxed and getting an understanding of the skier Andrea wishes to be, I’ll ask to see her bare feet, both of them, and if possible, her bare legs up to and including her knees. This is a non-negotiable request.
Once I have Andrea’s bare feet before me, I ask to take control and do so, re-positioning her feet in a roughly 6-inch wide stance with her toes pointing at me. I’ll be looking for any red spots, calluses, signs of prior injury/surgery and, of course, examining her overall foot structure, ankle position and leg shaft angle, both straight-on and from the side. I’ll ask about any history of injury.
Now it’s time to get serious. First, I swipe my hands over Andrea’s feet, starting at the heel and working forward. I’m feeling her bones, particularly the calcaneus, navicular, first cuneiform, styloid process and metatarsals. I’ll perform brief diagnostic tests of Andrea’s ankle range of motion, arch flexibility and forefoot plane. I may take an impression of the plantar surface to look in particular at her arches, anticipating what sort of underfoot support she’ll need.
I’ll measure both her feet with a metric measurement tool. Ski boots do not reason in American sizing and if metric (aka, mondopoint) sizing had equivalents in American sizes the two systems would be the same. So, I don’t bother with American measurements and don’t usually measure the arch length, as I already know a lot about it, including its length relative to the total foot length. Where warranted, I’ll also measure the heel-instep perimeter (HIP).
At this point, I’m pretty sure what boot, in what size and with what modifications I’m going to suggest for Andrea, but I’m not positive what flex is going to be optimal.
Bear in mind all the inspections I’ve done have taken practically no time. I swiped her feet in 30 seconds, did a R.O.M. test on her ankles and Windlass test on her arches in less than that. Measuring two feet doesn’t take long, nor does taking an impression on a plastic film. I’m in maybe four minutes and I know a lot about Andrea and what I don’t know I’m about to find out with her first boot, which is coming right up.
But before I disappear into the boot stacks, I tell Andrea what I’ve just learned. This is the moment where curiosity turns into trust. What I’ll say goes something like this:
“My dear Andrea (for I feel I know her so well now), I can already tell you’re going to be a very good skier in very short order. You’re an active athlete – the calluses on your first met-heads and overall tension from your toes to your knees confirm your passion for cycling. Your arches aren’t particularly high, but they are tight and probably give you problems. You probably have a ¾ orthotic in your cycling shoes, don’t you? And your first cuneiform bone causes discomfort in some, but not all, of your footwear, both athletic and casual.
“Your skiing is about to take a giant leap forward for three main reasons: you are getting out of rental and second-hand boots that never fit you in the first place and into a boot that will help you maintain dynamic balance. To do this, we need to support that sometimes angry arch of yours with a custom insole to which I will make some modifications to relieve pressure from your first ray. And we need to shim behind your narrow calf so you stay forward into the front of the boot so you can learn proper steering, something you’ve yet to experience.
“Most importantly, your ankles are so tight they have a somewhat limited range of motion. Nothing to get too excited about, but we do want to keep you pressed into the tongue so you get the benefit of what movement you do have. This is why I’m going to bring you two boots, one stiffer than the other, to see which will be better for you.” (I already know the answer to this, too, but I want Andrea to feel the difference and understand why I’m recommending the stiffer boot despite her current ability.)
Well, my five minutes are up and the boot sale isn’t over by any means, but I hope I’ve demonstrated both to Andrea and to you, Dear Reader, that’s it’s probably okay to trust me. I know exactly which boot will allow me to address all of Andrea’s needs, optimize her dynamic balance and produce an environment so comfortable she’ll never have to fuss with her buckles again.
Oh, and the third reason Andrea is going to get good in a hurry is that guy over in the corner nodding his head and smiling. He’s planning on skiing a lot this year, and now he knows he’ll have someone beside him to share his passion.
Chapter-05
6 Boot Facts You Should Know
An alpine ski boot is the most complicated piece of footwear you will ever own. It doesn’t matter how expensive a boot you buy, if it isn’t fit properly it’s more likely to work against you than for you. Selecting the right model and fitting it accurately is not a project you should attempt on your own. Get to know a veteran bootfitter and entrust yourself to his or her care.
You’ll be a better boot buyer if you have some idea about how ski boots work before you sit down on the bootfitting bench. Below is a fistful of facts that will help you be a better boot buyer and owner.
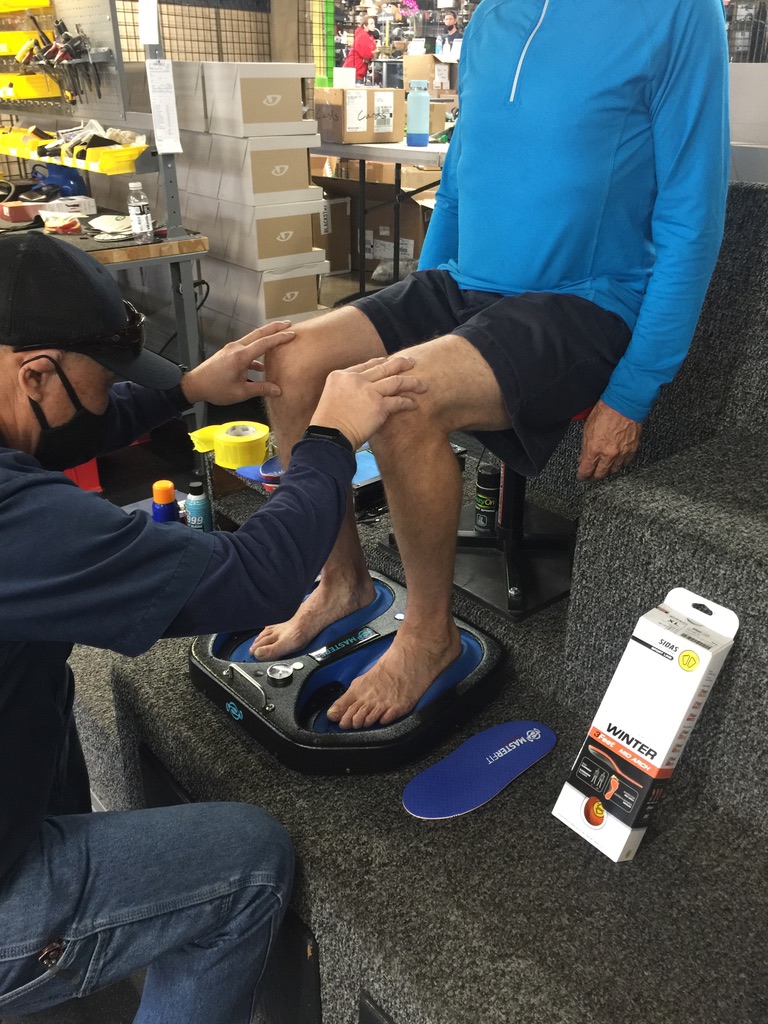
1. The quick fix for a great fit is a better insole
The insole that comes with a new Alpine ski boot is little more than a shim; it is meant to be neutral and seeks not to offend. For most feet, it won’t provide adequate support. There are several brands of off-the-rack insoles that come in a variety of arch shapes; for around $50, a well-matched insole of this sort will support your foot and instantly make a better match with the rest of the fit around the foot.
If you decide to re-commit to being a full-time skier, consider upgrading to a custom-made insole that’s molded precisely to match your foot and your stance.
2. You can’t judge the fit of an unbuckled boot
It’s not that your toe might touch the end of a boot you’ve just wriggled into for the first time, it will touch the end if the size is right. Try not to panic: your toes won’t stay smushed for more than the 60 seconds or so it takes to buckle up securely and start flexing the cuff. Every time you flex forward, your heel will crawl backward and toes will find themselves with a little more room. Remember, at this embryonic stage of the bootfitting process your bootfitter has yet to apply any number of different remedies that will generate all the toe room you need.
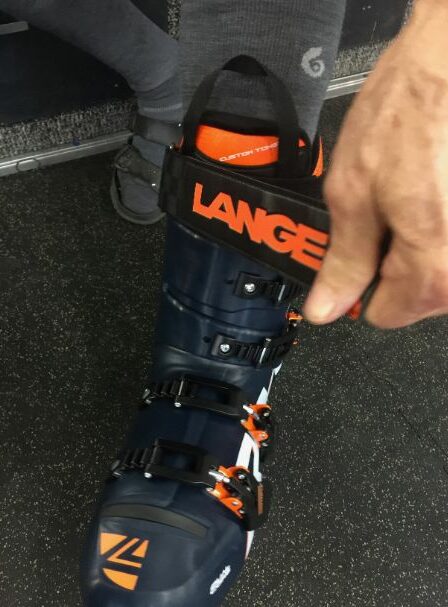
3. Buckle tension should vary.

The top two buckles that close the upper cuff don’t abide by the same guidelines as their comrades on the lower shell. One of the principal functions of a ski boot is to stabilize the rear foot in the back of the lower shell, a job best left to the top two buckles. This is why they need to be tightened until the skier and cuff move as one. Now that shells come in narrow, medium and wide lasts, the lower shell should match the foot well enough that very little buckle pressure is required to hold it place. Over-tightening the lower buckles puts a tourniquet on the forefoot, kills a high instep, crushes a flat foot and does nothing to improve your foot function. So, don’t do it; keep the lower buckles loose.
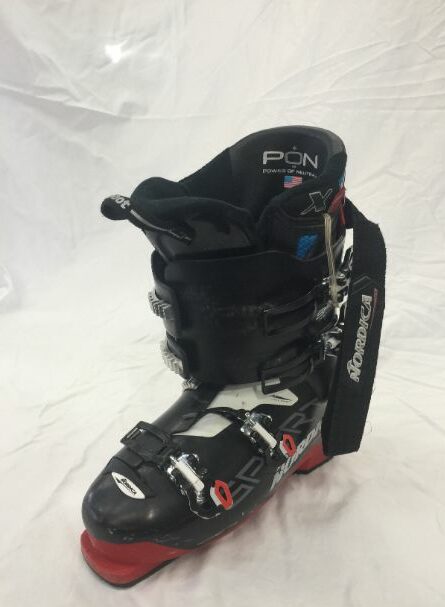
4. All Polyurethane (PU) shells are heat moldable
 Several boot brands make models with shells marketed as heat moldable. It’s a terrific feature and a valuable fitting tool. But the ability to re-mold PU around the foot isn’t limited to “heat-molded” models. Any boot that uses a quality PU or PE (polyether) shell can be heated and distorted into a new shape; it’s simply that boots marketed as heat moldable do the operation with the skier in the boots. Both localized, spot re-molding and global remolding where the whole shell is heated are effective fitting methods in the hands of an experienced bootfitter.
Lower grades of plastic like polypropylene that are used to achieve a lower price point are easy to wreck with too much heat. Nylons like Grilamid, prized for their lightweight and insulation properties, are murder to re-mold.
5. Why you buckle your boots when not in use
 Because polyurethane (PU) has a memory, that’s why. What the material remembers most vividly is the moment of its birth, when the cuff was pulled off the mold in a big “U” shape, the arms where its buckles will soon be attached sticking straight out. The moment the boot is left unbuckled, it begins to migrate back into this natal state. If allowed to unfold its way back home again, getting the boot back on will be a titanic struggle you may not win. It takes about 30 seconds to re-buckle a boot you’ve just removed. It’s time well spent.
6. Thinner socks matter.
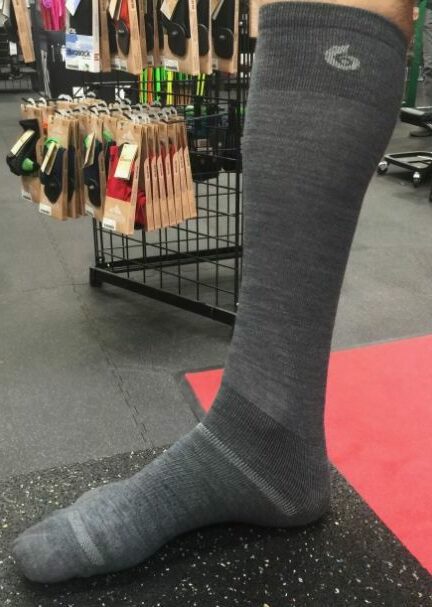 It’s not just that they’re warmer, although they are. Thinner socks are better because they don’t bunch, and are usually made from a blend that includes natural fibers for feel and synthetics for wicking, so the foot stays dry and comfortable. Thinner socks also slide more easily into the narrow confines of the lower shell. Once the boot is buckled, thinner socks take up less room, so the skier’s anatomy is closer to the steering surface of the shell. A ski sock should be thought of as part of the fit system, where its role is to improve the link between skier and snow. A thin sock provides better feel and allows for clearer feedback. They will help make you a better skier.
Chapter-06
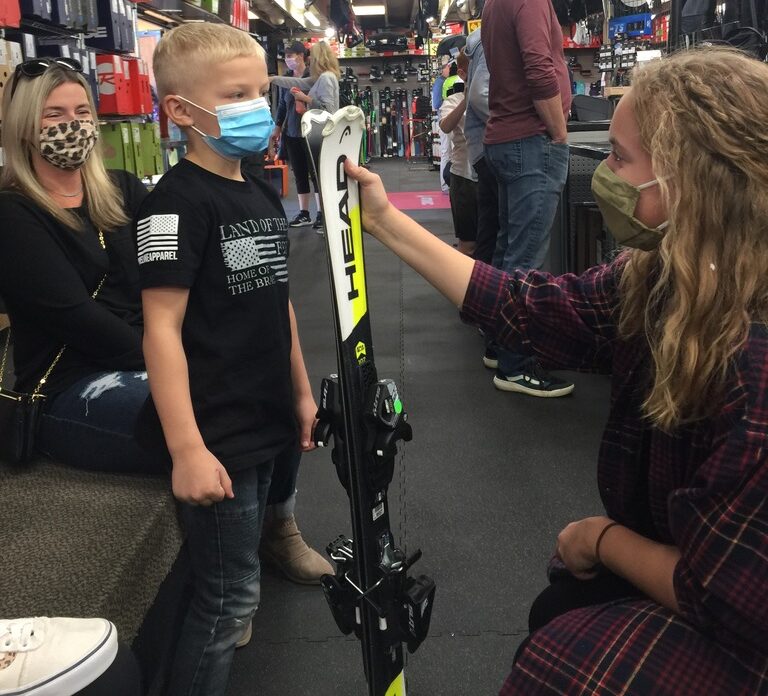
Bootfitting Best Practices in the Covid Era
The following recommended practices have been adopted by virtually all American specialty ski shops. They are intended to allow for the highest level of customer service while adhering to CDC guidelines for reducing the likelihood of spreading Covid-19 and its variants. Adhering to these guidelines will help safeguard shop personnel while creating a comfortable environment for customers.
- ALL BOOTFIT CUSTOMERS MUST WEAR A FACEMASK.
- To help eliminate overcrowding in the bootfit area, bootfitting may offered by appointment only. Check with the shop you plan to visit before you go.
- Access to the bootfit area may be managed by a gatekeeper/greeter, who will verify appointments and control access to the bootfit area.
- To minimize crowding, access to the bootfit area may be limited to customers being fit for boots, unless parental assistance is required.
- Customers must wear clean (preferably new) socks for the fitting.
- All surfaces and tools should be disinfected before each fit session.
- Bootfitters should apply hand sanitizer frequently and wear a facemask. Bootfitters may also opt to wear disposable gloves and/or protective eyewear.
We hope that the adoption of these practices will help foster better service, encourage civility and cooperation during challenging times and promote an abiding sense of community among all skiers.
Chapter-07
Boots On, Boots Off
No doubt about it, ski boots can be a royal pain to take on and off. But they don’t have to be. Here are a few tips to make this part of your ski day less of an ordeal.
Start with a warm boot.
If you try to put on a cold boot – or worse yet, a cold, wet boot – every step of the process will be harder and the result far less satisfying.
So don’t let this happen. Get a heated boot bag, use the heater in your car, warm your boots near a heat source at home, but however you manage to do it, warm up your boots before you try to put them on.
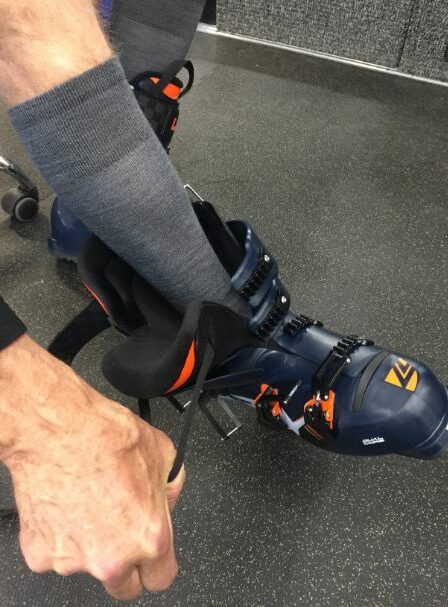
Pull the tongue out of the way.
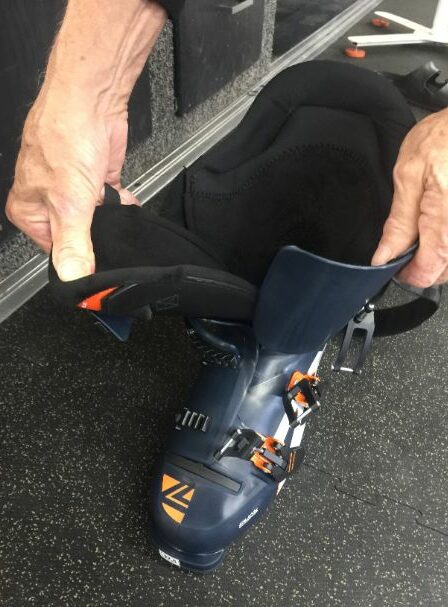
That loop on the top of the boot tongue isn’t for carrying them around, it’s to help you get the boot on. Grab it and pull the tongue out and upward to create the maximum opening for your foot.
Rotate your foot slightly to the side.
If you rotate your foot slightly to the side it will be easier to fit past the narrowest point in the boot throat. As your foot drops in, allow it to naturally rotate back to a neutral position.
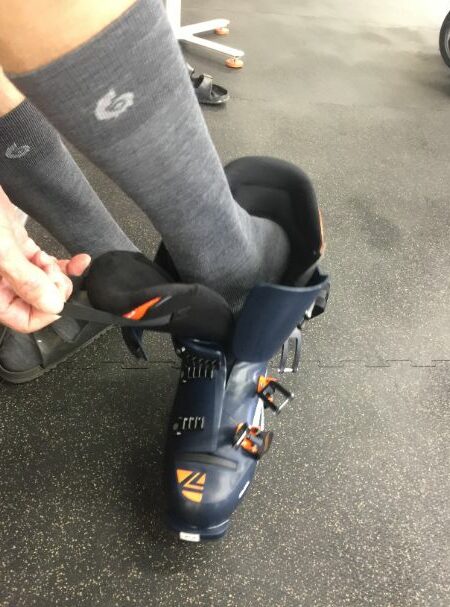
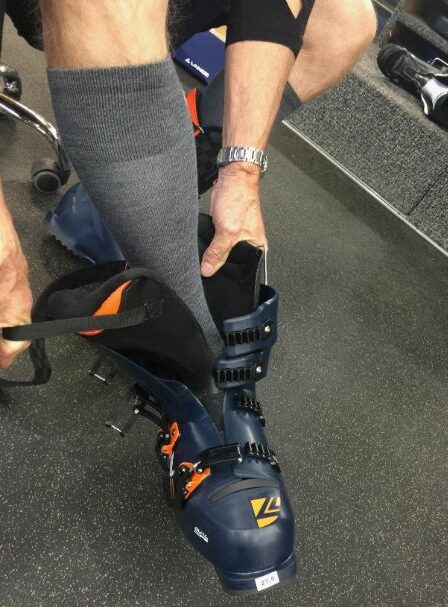
Pull up on the inner boot.
Now you’re in, but your foot may not be seated all the way down and back in the liner. Grab the inner boot by the sides and rear loop (if available) and pull upwards as you gently work your heel into the back of the boot. Position the tongue so all edges are inside the sides of the inner boot.
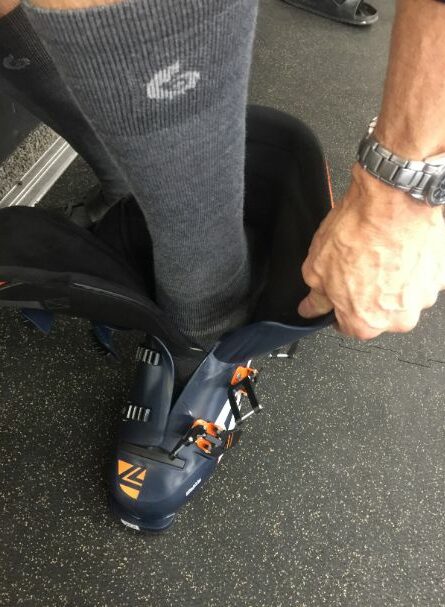
Buckle up incrementally.
Begin with whatever buckle is easiest to get started, but keep the tension light. Once all buckles are lightly latched, begin to increase buckle tension on the cuff buckles until your lower leg and ankle feel well held. Flex a few times to ensure your heel is all the way back in the shell. Tighten to skiing tension, then close the Velcro strap to match that tension.
Once the ankle and heel are secure, the important work is done. If you have been sized and fit properly, it will only take minimal pressure on the two lower shell buckles to hold your foot securely. DO NOT OVER-TIGHTEN THE BUCKLE OVER YOUR ARCH. There’s no need to, and if you do so you are certain to cut off circulation, leading to cold feet, pain, numbness and general misery.
Getting them off.
Chances are, your boots are coming off cold, which makes this process a little trickier than putting them on. Open all the buckles and give each one a quarter twist as you go so it won’t be able to re-latch when you’re not looking. Pull the tongue forward and up and begin to pull your foot up.
This is where you’ll hit resistance. Rotate your foot slightly to the outside while you brace the top of the rear spoiler, then pull your foot out as you push the boot away.
Chapter-08
What belongs in your boot bag
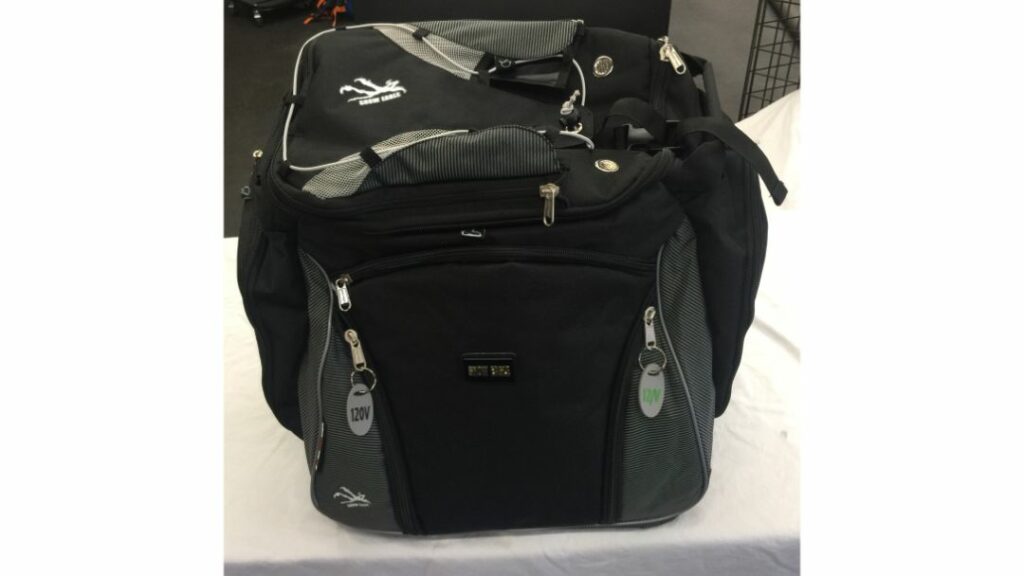
First you have to get a bag, but not just any bag. A boot bag is a specialty luggage item, with a separate compartment or two to segregate your snow-shedding boots from the rest of your stuff. The ideal boot bag incorporates several other pockets for all the other accessories you might require on a ski day.
Before we get to the business of filling those pocket and sleeves with the essentials, we should mention an optional boot bag feature that is worth every penny of the upcharge it commands: heat. A heated boot isn’t just a more comfortable boot; it means the shell and cuff will be soft and easy to slip into, a godsend on cold days when rigid boots don’t want to cooperate.
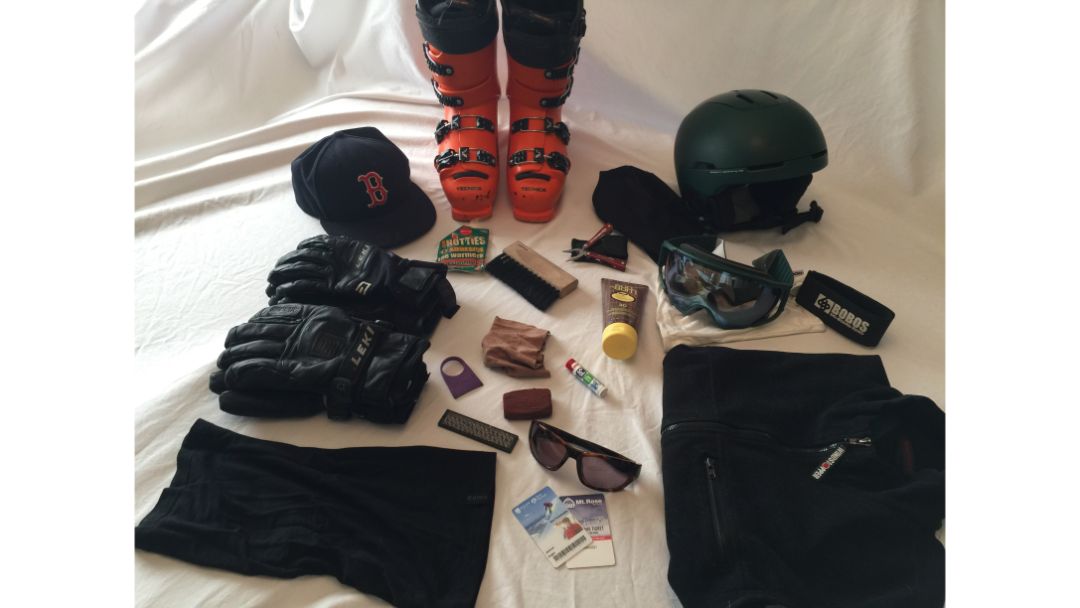
With or without a heating unit, here’s what should go inside your boot bag. Everything you put in the bag is one less thing you’ll forget to bring. Don’t forget to include your neatly buckled boots.
- Season pass. The one item you cannot leave behind.
- Goggles and/or sunglasses. Going without isn’t an option.
- Sunscreen. The higher the SPF, the better. Alpine sun is brutal.
- Lip balm. Stash lip balm everywhere. You’ll need it.
- Gloves. Not just the ones you’re already wearing. Extras.
- Helmet. Most bags have a compartment or external helmet pouch.
- Balaclava or neck gaiter. Much better than a mere facemask. Also handy in case it storms or wind picks up.
- Wind layer, usually vest or shell. Weather can change fast.
- Heat packs. To stave off penetrating cold.
- Gummi or diamond stone. To take off burrs and fix minor damage.
- Chamois or other scratchproof cloth. For goggle/sunglass lenses.
- Ski-Gee. An absolute savior on wet days. Best deal in skiing.
- Whistle. It takes up no space and when you need it, you need it.
- Ski brush. Less snow goes in the car or pod when day is done.
- Leatherman utility tool. Just in case.
- Ski hat or baseball cap. For when you take off your helmet.
Chapter-09
Binding Selection Advice
Bindings are little mechanical marvels, assigned the impossible task of walking a tightrope between release and retention in the worst possible weather, yet usually able to pull it off. The modern binding is able to be so remarkably consistent because both the binding and the boot that goes in it are rigorously standardized. Standardized shop practices also help to winnow out old, obsolete or otherwise incompatible system components.
Most skis in the Frontside category come with their own bindings, so binding selection is a fait accompli. All other skis are referred to as “flat,” meaning the binding choice is up to you. Here are the basic dos and don’ts of binding selection.
Do
- Know your binding setting. It’s based on your height, weight, age, boot sole length and skiing style. Any shop tech can help you do this in about 10 seconds.

- Pick a binding with your setting number (often called a “DIN” number) near the middle of the binding range. If your setting is “6,” a binding with a 3 – 10 scale should be fine.
- Ask a salesperson about any special features that may make one binding more suitable for you than another.
Don’t
- Continue to use a binding the manufacturer no longer indemnifies.
- Use a boot with a touring sole or walking sole that’s incompatible with your Alpine bindings.
- Use a boot with worn-out soles.
- Mix a child’s norm boot sole with an adult binding.
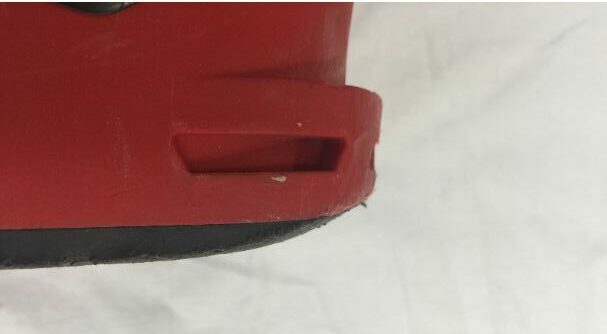
This boot heel isn’t completely worn away, but it’s getting close to retirement.
Binding Care and Maintenance
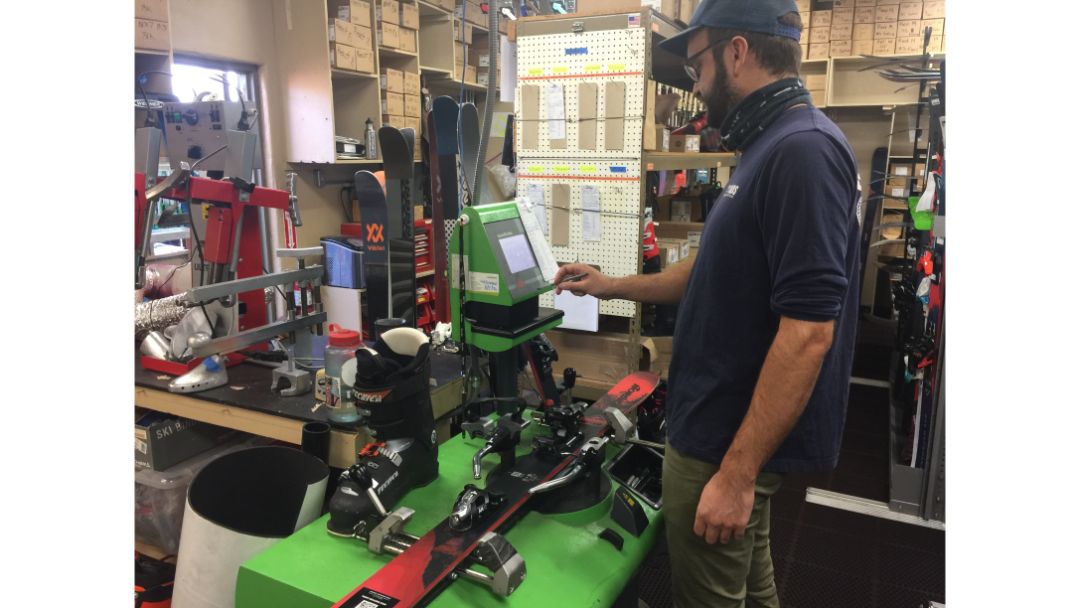
Any new bindings will be tested with your boots, new or old, to verify they release within a standard range. To maintain your bindings in proper working order:
- Keep all components clean. Avoid exposure to road filth during transport and household dust during storage. Use only with a clean boot sole.
- Clean with water. No solvents or harsh detergents that could strip away internal lubrication.
- Have your ski/boot/binding system professionally inspected and tested prior to each season.
Chapter-10
Before you buy your kids new skis and boots, rent.
Whether you rent gear for a day, a week or a season, rental makes far more sense than purchase at this stage. There’s very little difference between rental and retail gear at this end of the market, so there’s no real advantage to ownership. The best option is a season lease, as it entails only one shop visit and the costs are reasonable, often $200 or less for a full set of gear.
Bootfitting for Kids
Children are going to grow out of their equipment seemingly overnight. This is why any boot a child is going to use for a season ought to be over-sized by a full size.
If fit true to size, the child is likely to outgrow the boot (ouch); any fit looser than a full size risks the child having zero control as his/her feet slide forward in the outsized shell.
In an ideal world, you could swap the smaller size for a larger one mid-season, but lease inventories don’t usually have many boots in stock once the season is rolling.
The practice of over-sizing boots will continue until the youth’s foot stops growing, usually around the mid-teens. At this point, the young adult will be out of kids’ gear entirely, and should be sized and equipped according to adult criteria.
Ski Sizing for Kids
While boots need to be up-sized for kids, the same concept doesn’t apply to skis. The worst thing you can do for a child, equipment-wise, is put them in a boot they can’t control on a ski they can’t control.
Beginning kids should have skis that just reach the chin. Once skiing comfortably and in control, length can grow to nose-height. By the time the child attains advanced ability, you’ll have a clear idea of his or her needs.
Kid’s Binding Options
As for bindings, most kids’ skis are systems, meaning they come with their own bindings.
If buying a child’s binding à la carte, be sure it’s a junior binding designed to accept children’s norm boot soles. It will have a DIN scale of roughly 0.5 – 4.5.
Junior bindings that work with both junior and adult soles usually have a DIN scale from 2 – 7.
Chapter-11
Picking Poles
If you’re a new skier, you’ll be amazed by the number of ways the ski trade has figured out how to manufacture a stick with a grip on one end and a point on the other.
But entry-level and occasional skiers need not complicate a pole purchase. Getting the right size with a grip that feels comfortable will get the job done.
Skiers who get hooked on the sport will inevitably want to upgrade if for no other reason but personal style. Below are some of the options to consider.
About Sizing
Sizing poles is simple.
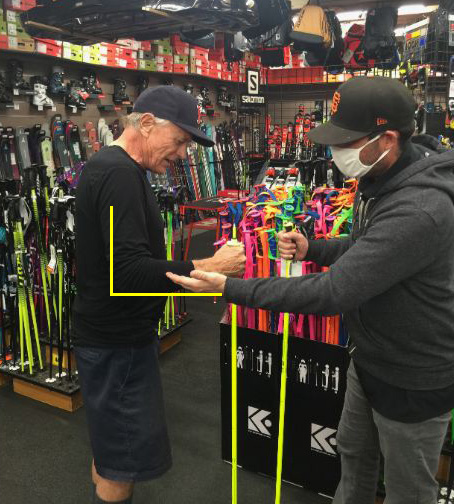
- Turn the pole upside down, so the tip is pointed upwards.
- Grab the pole under the basket and put the handle on the ground just in front of your feet.
- If the size is right, your elbow will be at a right angle, with your forearm parallel with the ground.
About Grips
The one part of the pole you feel most intimately is the grip. Better grips are more ergonomically shaped and multi-material, for better feel.
All grips include some form of strap, which comes in a variety of materials and configurations.
- The most common strap is an adjustable loop designed so your hand can rest against the strap when skiing. The most common mistake is grabbing the grip by putting your hand down through the loop; the strap only works for you if you put your hand up through it.
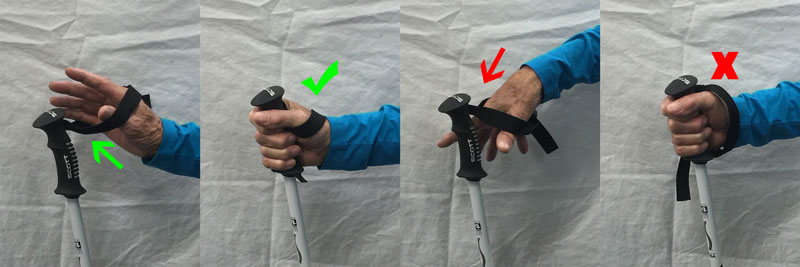
- The integrated strap doesn’t actually have a strap, but uses a link built into a lightweight glove harness to clip into a latch on the top of the grip.
- The strapless grip uses molded flanges to grasp the back of the hand.
About Shafts
As with grips, shafts come in a variety of materials and configurations. The most widely used material remains aluminum, although carbon and carbon-laced composites have their fans. You can even find poles made of bamboo, if that fits your retro style.
Aluminum comes in many grades, from the first price point to the MSRP stratosphere. The best alu shafts are lightweight and tapered for better balance.
The first carbon poles were dubbed “pencil poles,” for these highly flexible, narrow cylinders were about pencil-thick. Carbon’s edge over aluminum is its resistance to crimping when bent. Today carbon is available in several shaft styles.
Composite shafts mix carbon with cheaper materials to provide a sturdy, lightweight alternative to aluminum at value price points.
And if you really want bamboo, this all-natural solution comes with a long, padded and strapless grip.
Chapter-12
Carry Your Gear Like a Pro
Skis
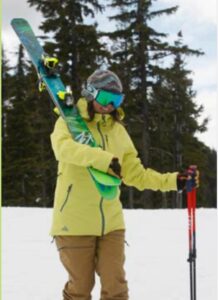 The brakes on all bindings are designed to slide together. If in addition you wrap a Velcro strap around the forebody, your skis will stay together no matter how you handle them.
To carry your skis for short distances, pick them up between the toe and heel pieces and carry them by the middle. For longer hauls, balance them on your shoulder, tips forward, holding the forebody with one hand, leaving the other free for poles, which you may need for balance on slick parking areas.
When carrying your skis in congested areas like tram lines or busy plazas, carry your skis vertically to avoid clobbering your fellow snowsports enthusiasts.
Boots
The best way to carry your boots is to undo the Velcro straps on both boots, then match them up end to end so they adhere to each other. Try not to leave any exposed Velcro that could snag on clothes or hair.

Place the straps over your shoulder so the boots are evenly balanced on either side of you. This leaves both hands free for skis and poles.
Chapter-13
How long will skis, boots and bindings last?
How long your gear remains in tiptop condition depends entirely on how well it’s maintained. Here’s how to keep your equipment in optimal condition for years to come.
Daily Maintenance
- Skis: Wipe clean and dry. Check for dings on edges and bases.
- Boots: Buckle all buckles with just enough tension to keep closed. Be sure soles are clean and no mud or debris is lodged in tread.
- Bindings: Wipe clean, particularly at boot/binding interfaces.
Every 10 Skier Days
- Skis: Freshen up side edges with a light filing, followed by hand polishing. Fill cuts in bases if necessary. Wax, scrape and buff.
- Boots: Visually inspect for sole wear and damage to buckles.
- Bindings: Visually inspect for excessive wear, damage or missing parts.
At the End of Each Season
- Skis: Clean and wax, but don’t scrape. Store in a clean, cool, dry location. Avoid excessive heat and exposure to dust.
- Boots: Be sure liner and tongue are properly aligned, then buckle with sufficient tension to maintain shell closure. Store in a cool, dry place, like an interior closet. Avoid excessive heat.
- Bindings: If you use a high release setting, you’ll prolong binding life if you turn your settings down in the off-season. Your bindings should be clean and dry before storage.